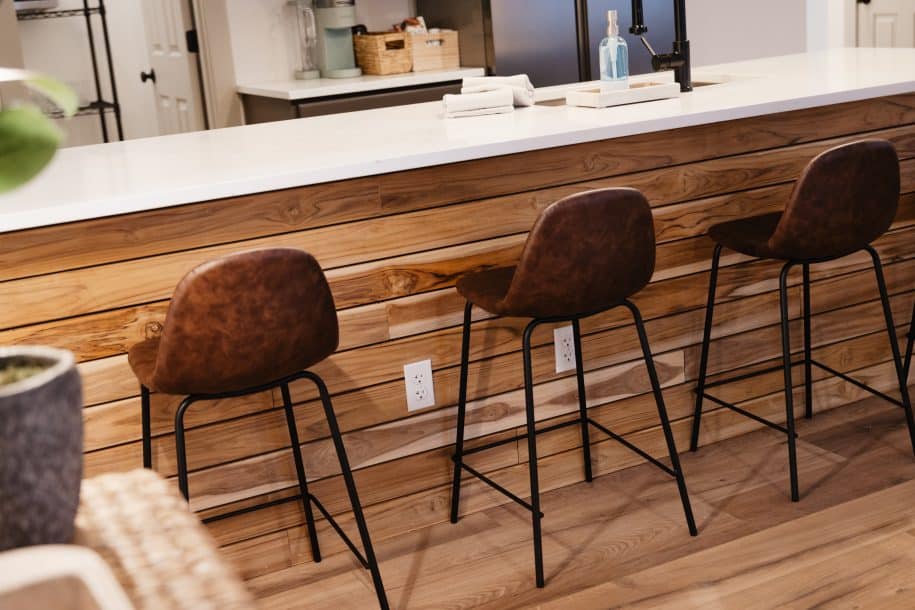

1. Choose a countertop edge you like by touch as well as by sight
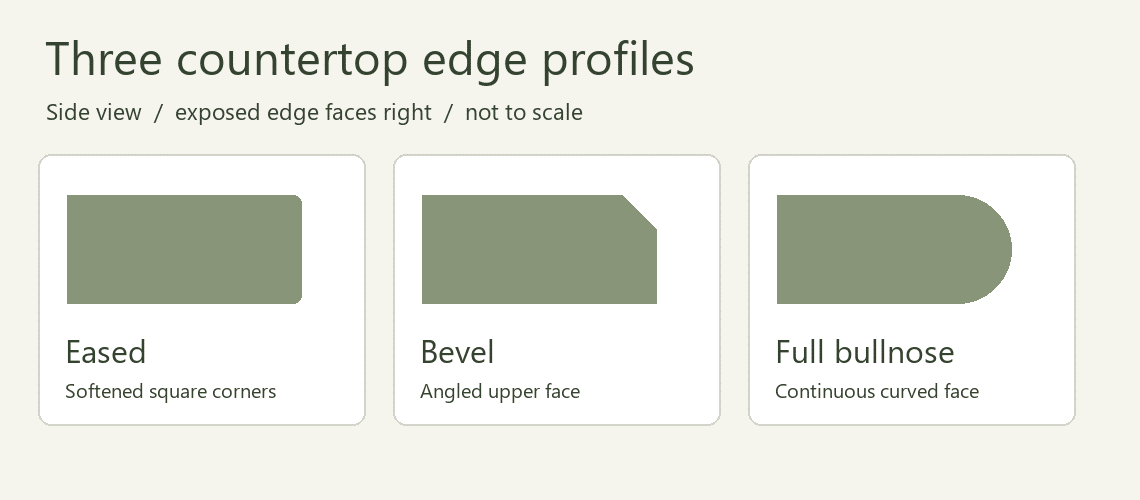
Ask to hold a finished sample at counter height. Rest your forearm against it as if you were chopping onions, then look at it from across the room. An eased edge keeps a nearly square face with softened corners. A bevel cuts a flat angle across the upper corner and catches a distinct line of light. A full bullnose rounds the face into a curve. Two profiles that look similar on a phone can feel quite different when you lean against them.
Specify the front profile and the outside corner separately. The first describes the edge seen from the side; the second describes the turn at the end of a run when viewed from above. Rounding the top lip does not round off a projecting island corner. Mark the corner beside the route to the refrigerator if that is where people brush past.
Compare the fabricator’s samples with the Caesarstone edge illustrations, then ask which profiles are available in your chosen material and thickness. If “standard countertop edge” appears on the quote, have the shop name or draw that profile before you approve it.
2. Size the sink with your largest pan and your actual cabinet
Take a sheet pan or stockpot to the showroom. Lay it flat, turn it to rinse a corner, and see how much room is left for another dish. Use the inside bowl dimensions for this test. The advertised sink width often describes the outside of the fixture, not the space your pan can occupy.
A single bowl leaves an uninterrupted area for large cookware. A divided sink gives you somewhere to drain or rinse while one side is in use. With workstation kitchen sinks, repeat the pan test with the cutting board and rack in place. If those accessories reduce the opening too much, you may spend more time finding somewhere to store them than using them.
Now open the sink cabinet. The bowl, supports, drain, disposal if specified, and any pullouts must share that space. Give the installer the exact sink specification sheet, including its stated minimum cabinet size. If keeping existing cabinets, ask them to inspect the inside rather than relying on a door-front measurement.
3. Approve the countertop edge around the sink opening
For an undermount sink, “reveal” describes how the cutout meets the bowl. With a positive reveal, a strip of the rim shows. With a flush or zero reveal, the countertop edge lines up with the inside wall of the bowl. With a negative reveal, the counter projects over the bowl slightly. Elkay’s illustrated sink guide shows the difference.
Look at a finished corner as well as a straight side. Imagine wiping flour across the opening, then cleaning the joint beneath it. If a board or drain rack rides on a ledge, ask the sink supplier which cutout preserves that function. A reveal that works on a plain bowl can block an accessory on a different model.
A drop-in sink changes the decision: its rim sits on top, so the lip you wipe over belongs to the fixture. An apron-front sink changes the cabinet front as well. Tell the cabinetmaker about that choice early; swapping one of these styles for another is more than changing a line on the plumbing order.
4. Check where the faucet stream lands
Spout height tells you whether a pot fits underneath. Spout reach tells you where the water lands. On a paper outline of the sink, mark the proposed faucet center and use the manufacturer’s side drawing to mark the outlet. Is the stream over the part of the bowl where you rinse, or so far back that you would hold a heavy pan against the rear wall?
Test the handle through its full travel with a backsplash behind it. At a window sink, check the crank, sash, and trim too. For pull-down kitchen faucets, look under the counter: the hose needs a clear path to return. Ask the plumber to check that path with the disposal, bins, and water filter in their final positions.
5. Put every hole on one drawing before fabrication
List what will actually sit on the deck: faucet, separate control if applicable, soap dispenser, filtered-water tap, and any other fitting specified by the plumber. Tape paper circles the size of the fixture bases onto a full-size paper layout. Try reaching each one with wet hands. A soap pump may technically fit behind the bowl yet be awkward to refill.
Label each circle with its model and purpose. The installer should confirm hole sizes and spacing from the current product drawings; the fabricator should confirm what the slab and cutout allow. Do not use a generic drill size from a showroom display. If you are considering an extra hole “for later,” decide what will cover it and whether that fitting will interfere with cleaning now.
6. Bring a selection sheet to the template appointment
Templating is when the shop records the installed conditions for fabrication. Ask in advance which fixtures must be on site, whether the actual sink is required, and what work needs to be complete. A retailer’s listing for a similar sink is not a substitute for the model you purchased.
- Cabinet plan: Mark the sink base, dishwasher side, finished end panels, and any seating overhang.
- Countertop edge: Name the profile and mark each exposed edge. Identify any thicker-looking built-up section separately.
- Sink and faucet: Record exact model numbers, bowl orientation, reveal, and accessory holes. Attach the installation drawings.
- Approval: Ask who will issue the final drawing and who should be contacted if site measurements differ from the plan.
For example, moving a sink a little toward the dishwasher may buy landing space on the other side. It can also move the drain over a cabinet partition or leave the faucet off-center under a window. Review those consequences on the same drawing rather than approving the move from the countertop view alone.
7. Compare quotes and check the finished installation
One quote may include a finished undermount cutout, while another lists a slab price and an allowance for fabrication. Ask each shop to identify the sink cutout, edge polishing, fixture holes, templating, transport, installation, and any additional countertop edge charges. Also ask who supplies sink supports and who reconnects plumbing. Those answers make two prices comparable.
At handoff, run the faucet in its normal position, rinse a large pan, and let the spray head retract. Open the bin pullout while checking below for interference. Run a cloth around the sink rim and along the front edge. If something needs attention, show the installer the exact spot while the fixture and cabinet are both accessible.
Keep the approved drawing, model numbers, care instructions, and finish names together. When a spray head or sink accessory needs replacing, that short list will tell you much more than a photo of the finished kitchen.
Related services and project examples
Explore kitchen remodeling, recent project work, client testimonials. Use the form below to describe the project you have in mind.