

1. Choose a shower valve for the outlets you will actually use
Start with a sentence about your morning routine: “I want to turn on the overhead spray from outside the shower, then switch to a handheld to rinse the bench.” That tells the plumber more than a photo of a handle. List every outlet you want and mark which ones you expect to run together. Switching between two sprays is a different request from running both at once.
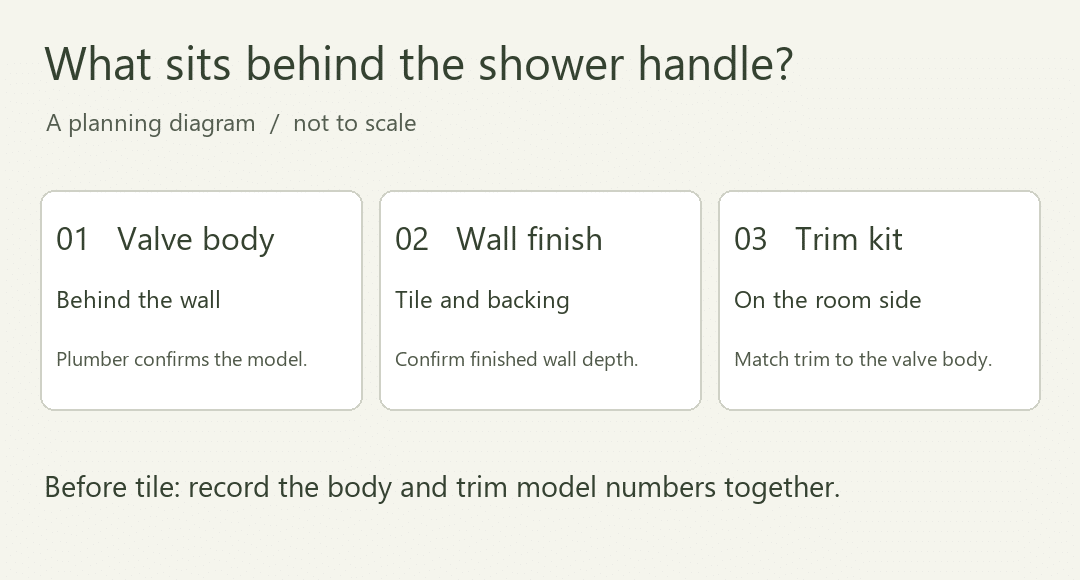
The valve body is the part behind the wall. The trim is the handle and cover plate you see. A diverter directs water between outlets. A trim kit can look exactly right in the showroom and still be incompatible with the body in your wall. Ask the supplier to put the model numbers for the body, trim, and any diverter together on one quote.
A pressure-balancing shower valve responds to changes in supply pressure. A thermostatic valve responds to water temperature; some systems pair it with a separate volume control. Handle count alone does not tell you which functions a particular set offers. Try the showroom controls and ask the plumber to confirm that the selected system can deliver the combination of outlets you want.
2. Test the reach before the shower valve goes into the wall
Use painter’s tape to mark the entrance, handle, niche, and handheld holder. Stand where the dry bath mat will go. Could you turn the water on without stepping into cold spray? Now stand where you would wash your hair. Can you change the setting without reaching behind you? If the shower has a seat, repeat the exercise seated. A comfortable standing position can be an awkward seated reach.
Bring the tile sample to this conversation. The plumber sets the shower valve relative to the finished wall, while the framing is still exposed. Backer, waterproofing, tile, and setting materials all contribute to that finished surface. Have the tile installer and plumber agree on the wall build-up against the manufacturer’s rough-in instructions before either trade signs off.
3. Choose the drain and floor tile together
A point drain usually calls for a floor that slopes toward it from several directions. Smaller pieces can follow those changes more easily. If you love a large tile, ask the setter to sketch the cuts around the drain on a tile layout. A sample viewed flat on a counter will not show where those cut lines land.
A linear drain along a wall can allow a single sloping plane. It is a useful option when continuous tile lines matter, but the grate is only the visible part. Ask where the outlet sits underneath, whether moving the plumbing is included, and how the waterproofing connects to the drain body. The existing framing may make one location much more practical than another.
For maintenance, ask to see how the grate lifts and how you reach the hair catcher, if the model has one. A concealed tile-in grate and an exposed metal grate may look similar from standing height but feel quite different on cleaning day. Keep the lifting tool somewhere it can be found after move-in.
4. Decide what happens at the shower entry
Think through the route of a drop of water: off the showerhead, across the floor, and toward the drain. Then think about water that misses that route, such as spray from a handheld pointed at the entry or drips from an open door. Ask the team to mark the spray direction, panel length, and dry landing area on the same plan.
For a curbless entry, discuss the transition to the bathroom floor before selecting tile or ordering glass. The height available for the shower assembly, the location of the drain, and the adjacent floor finish all matter. If you are working within an existing footprint, ask for a comparison with a low curb so you can see what each option changes in the scope.
5. Compare shower glass by how the bathroom works
- Hinged door: Mark the full swing, including the handle. Open the vanity drawer and picture a towel hanging on the nearby hook. A door that clears an empty wall can still hit something you use every day.
- Sliding enclosure: Useful where a swing would compete with the vanity or toilet. Check the actual walk-through opening and try reaching the overlap and track for cleaning.
- Fixed panel: Leaves an open path and removes moving door hardware. Ask where splash can escape, especially in a short shower or one with a handheld used to rinse the walls.
Two measurements serve different purposes. Early dimensions help the glass company plan hardware, support, and a budget. Final field measurements establish the fabrication sizes once the required surfaces are finished. Ask who schedules that visit, who approves the drawing, and whether fabrication time is included in the project schedule. Avoid treating a framing measurement as an order dimension.
6. Compare complete assemblies when reviewing quotes
One quote might include the concealed shower valve, trim, diverter, handheld, hose, and wall elbow. Another might list only a “shower trim allowance.” Compare what arrives in the boxes and what work is included. Do the same for the drain body and grate, and for glass measurement, hardware, fabrication, and installation.
For example, suppose you keep the valve location but switch from a fixed panel to a hinged door. The fixture finish has not changed, yet the hinge location may need support and the door swing may put the handle in the wrong place. Before approving the substitution, ask the glass installer and plumber to review the same marked-up drawing. Record the revised part numbers and lead times beside it.
7. Walk through the finished shower before handoff
Have the installer demonstrate the normal sequence: start the shower, adjust temperature and volume, switch outlets, and shut it down. Operate the glass with a towel on the rack and the bath mat in place. Watch where water goes near the entry during ordinary use. If a concern appears, point to the exact location while the team is there.
Keep one folder with the shower valve model, cartridge reference, trim finish, drain model, glass hardware details, and care instructions. Include any pre-tile photos the team can provide. Years from now, those records can distinguish a straightforward service call from a search for a part that merely looks right.
For additional background, review Schluter shower system resources. Check the requirements and instructions that apply to your own project.
Related services and project examples
Explore bathroom remodeling, recent project work, client testimonials. Use the form below to describe the project you have in mind.